To get the most out of Kentucky’s great climate, the key is to marry your indoor and outdoor spaces. We believe that the best way to achieve this is through the right door (or sometimes, the right door and window combination)! Let’s look at some options.
https://doorstoreandwindows.com/wp-content/uploads/2020/09/Modern-Direct-Glaze-Window-Ultimate-Multi-Slide-Door-Interior-Marvin-Windows-and-Doors-Beauty-HR-min.jpg7601000adminhttps://doorstoreandwindows.com/wp-content/uploads/2022/10/Door-Store-Windows_25th-Anniversary-Logo_JM-1.pngadmin2020-09-15 16:59:112021-04-09 11:19:48Connect Indoor and Outdoor Living Spaces
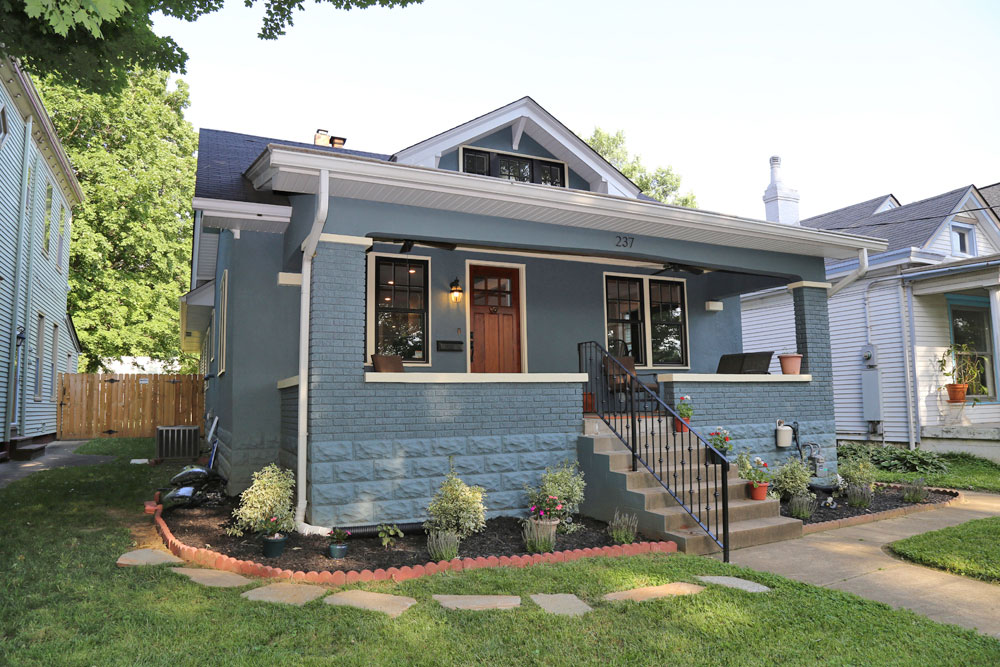
Renovating a historic home is one of the most fun and exciting projects you can undertake as a homeowner. Whether you’re modernizing an older home or staying true to the original design, remodeling historic homes can be a huge undertaking. We recently helped our client Stephanie with the windows in her historic Clifton renovation.
Our coworker, Karen, was able to get a Marvin window for her Crescent Hill house that perfectly matched the original window.
In Louisville, portions of your project may be subject to review by the Historic Landmarks and Preservation Districts Commission. There are seven local historic preservation districts in Louisville (Butchertown, Cherokee Triangle, Clifton, Limerick, Old Louisville, Parkland, and West Main Street), as well as individual landmarks.
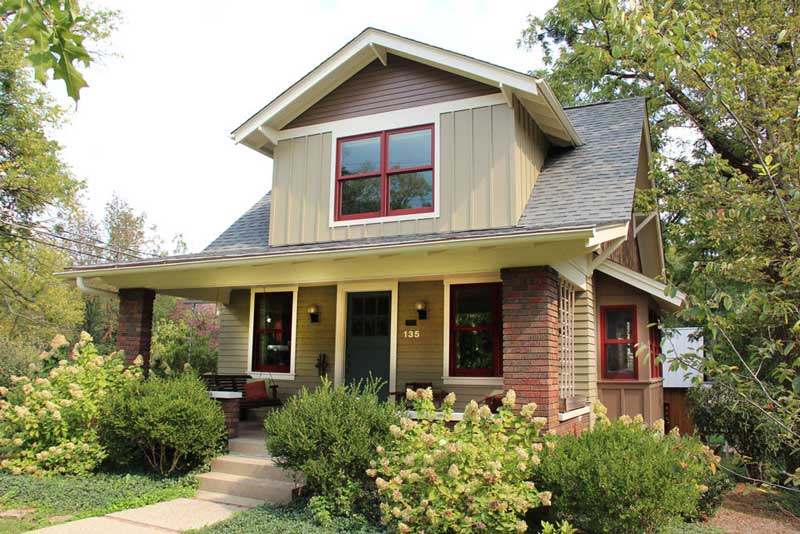
This charming Clifton bungalow is one of countless historic district homes the Door Store and Windows has helped to restore.
To learn more about the process, we talked with Becky Gorman, who works for Planning and Design Services and is staff to the Historic Landmarks and Preservation Districts Commission. She says that the best place to start with any exterior changes to a home in a historic preservation district is with a call to the Landmarks Planning and Design Department at (502) 574- 6230. Simply explain that you have questions about windows or doors and ask to speak to a Landmarks staff member, who will walk you through what you need to do to get started, the process of getting approved, and the design guidelines for your area.
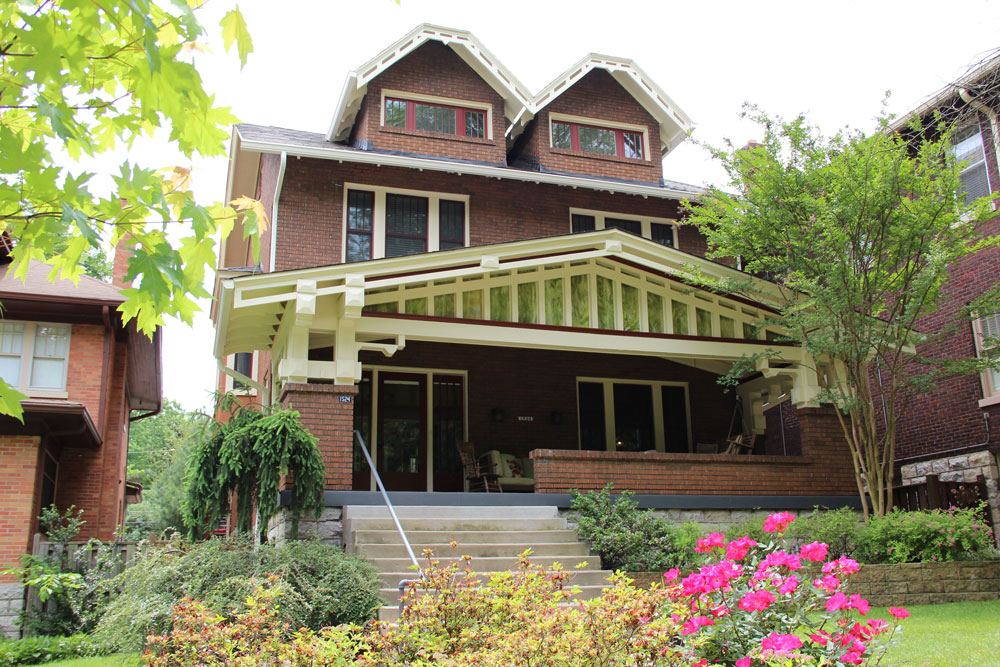
This sweet Highlands home required craftsman-style windows in a range of sizes, as you can see!
You can also do preliminary research online. On the Historic Preservation and Urban Design website you can find design guidelines for each district and the review process for a Certificate of Appropriateness (COA). A COA is the permit needed for exterior changes, and to obtain one, you’ll need to submit a Landmarks application. Your Landmarks application will be reviewed by a case manager, who will help guide you through the process of making any exterior changes to your home. For Stephanie, it included the recommendation that a contractor could repair her original street-facing windows.
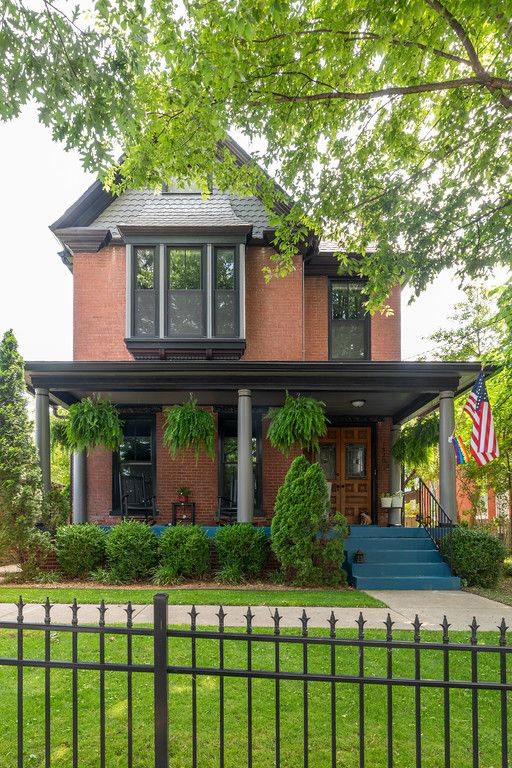
Dark, tall, and elegant windows set this stately Highland Avenue home apart. Historical accuracy does NOT mean dull!
The Historic Landmarks and Preservation Districts Commission Design Guidelines prefer that historic elements (like original windows) are maintained rather than replaced unless there’s a serious issue that can’t be fixed. For Stephanie, this meant repairing the windows facing the street, which she was just as happy to get fixed. “I love the fact that these windows are original,” she says. “They have that charming old wavy glass.”
With the front-facing windows in the process of being repaired, Stephanie contacted Door Store and Windows to address the windows on the side and rear of her home. “I knew that Door Store and Windows had a reputation for being able to match existing windows and that Marvin was great at historical replacements.”
We worked with the owner of this brick Belknap cottage to select deep red divided light windows throughout.
Our Window and Door Replacement Specialist Mark was able to assist Stephanie in selecting a window style that matched her original windows, including selecting a wood stain that matched her interior trim. Ultimately, Stephanie was not only able to get Marvin windows that perfectly matched the originals, she was also able to get sleek, low-profile storm windows to protect the 95-year-old windows on the front of her house.
This magnificent Cherokee home required dozens of uniquely shaped and historically accurate windows.
The most important thing to remember when renovating a home in a historic district is that for exterior renovations, like doors and windows, there are special steps you must take to complete your project. If you’re considering beginning renovations on your historic district home, visit the website of the Historic Landmarks and Preservation Districts Commission.
If you have questions about historic replacement windows or doors, contact Door Store and Windows to learn more, or stop by our showroom to see all of our unique designs.
https://doorstoreandwindows.com/wp-content/uploads/2020/06/IkruCmMc.jpg6821024adminhttps://doorstoreandwindows.com/wp-content/uploads/2022/10/Door-Store-Windows_25th-Anniversary-Logo_JM-1.pngadmin2020-06-10 14:49:112021-04-09 11:22:51Historic Districts and Landmarks
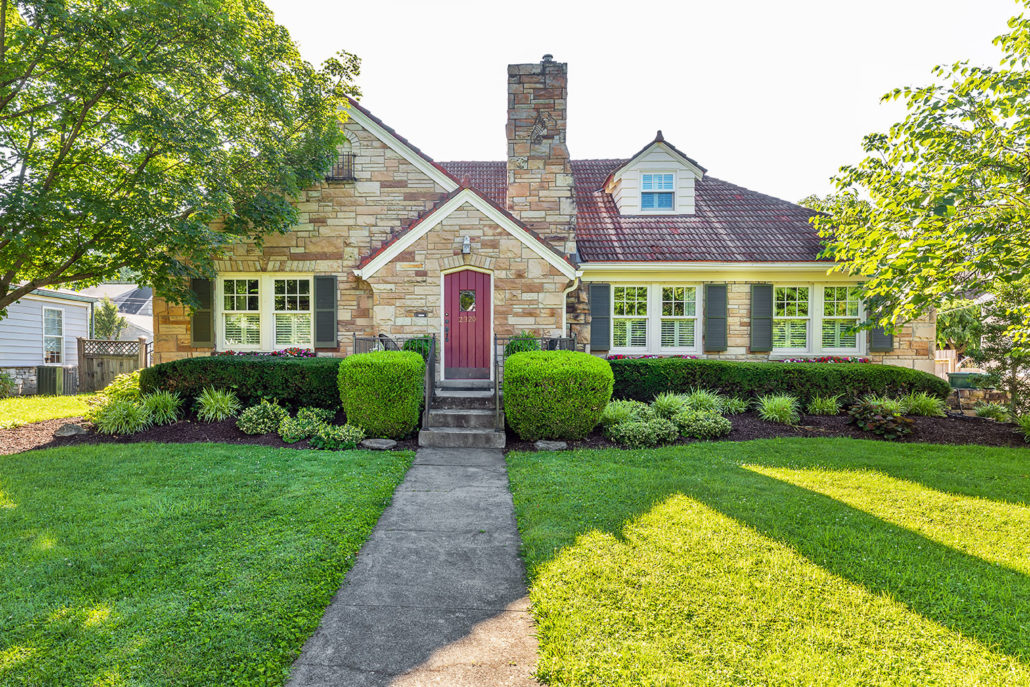
A recent customer approached us about her St. Matthews home. The home was built in the early 1930s and her recent renovation aimed to modernize it, while keeping the original aesthetic in place. A challenge? Not really.
There is no rule that says all hardware within a home must match. In fact, adding different finishes around the house, when done thoughtfully, can really add a new layer of design and interest within a home.
For this client, she was intentional not only about design, but also about her specific needs as related to both window and door hardware throughout the interior and exterior of the home.
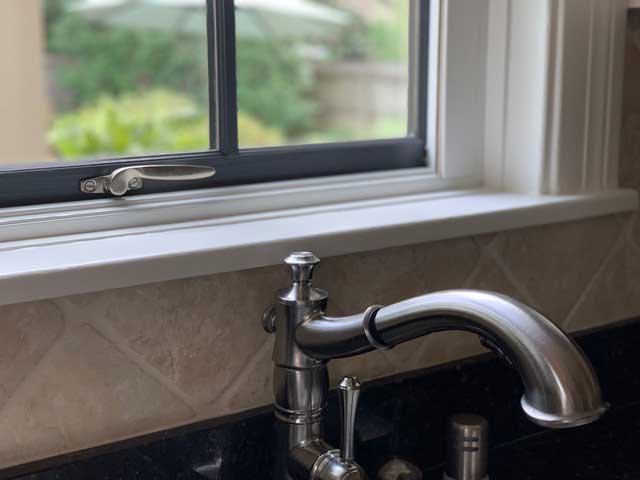
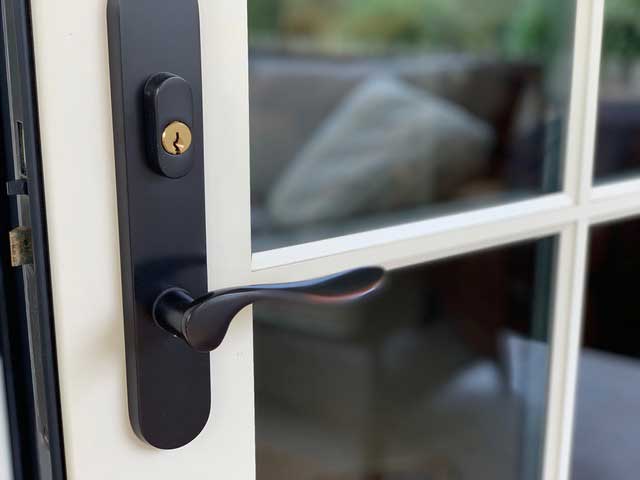
Brushed nickel hardware on the window matches the stainless steel appliances in the kitchen.
With stainless steel appliances in the kitchen, she felt brushed nickel hardware worked best and maintained consistency throughout the room. In other parts of the house, darker hardware was used due to touches of dark accents in each room.
Oil-rubbed bonze is considered a “living finish.”
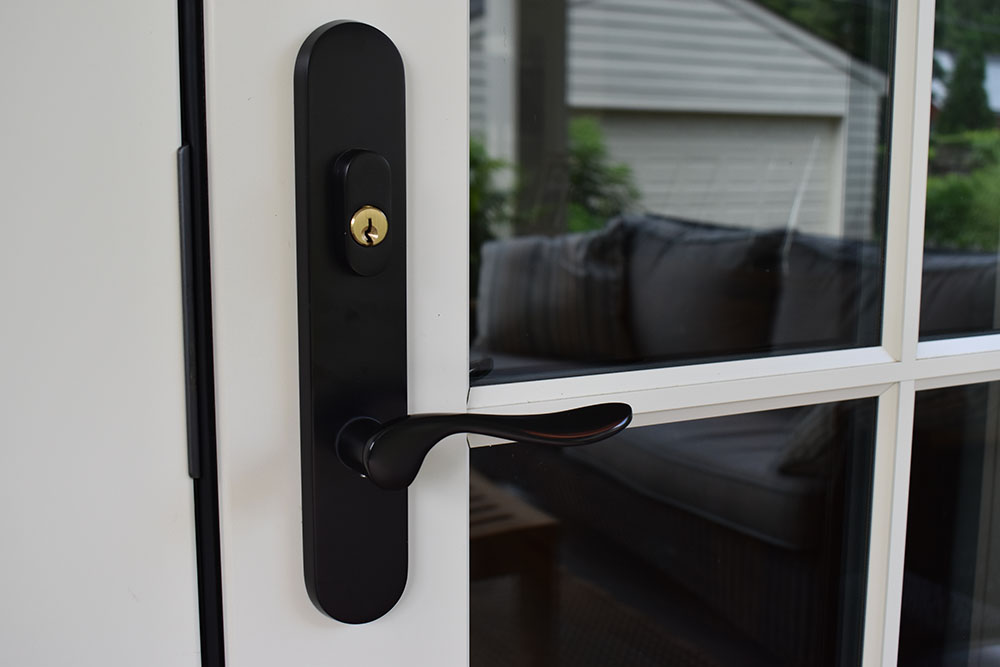
On her beautifully adorned brand-new back patio, she brought in the darker hardware with an oil-rubbed bronze. Oil-rubbed bronze is what’s known as a “living finish” which means it is uncoated with a sealant and will naturally oxidize over time to show a unique patina on the finish. It will transform slightly over time through exposure to the environment and regular use. Some refer to a living finish as a way for hardware to age gracefully, adding personality and charm to the doorknob over the years. This works in this beautiful space.
Dark bronze is sealed and perfect for doors in high-traffic areas.
For a more utilitarian approach, she selected a dark bronze doorknob for what is probably the door with the heaviest usage. Her side door is where she most enters the house from the car as she comes and goes throughout each day. For this reason, the dark bronze is the right fit as it is sealed and no patina or aging is expected. The color on a dark bronze piece of hardware will remain constant for years to come.
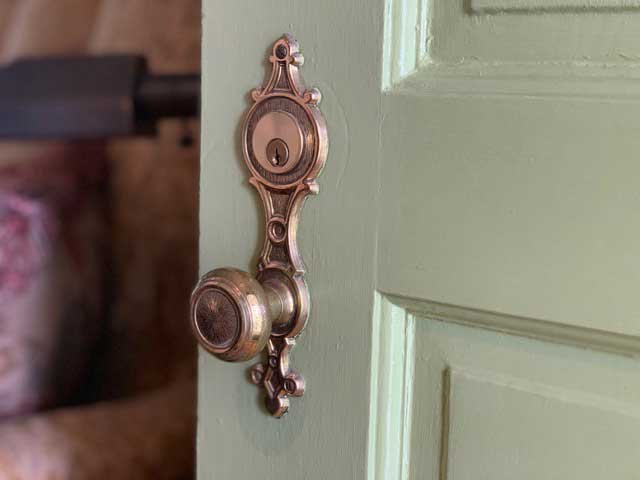
Finally, the question became what to do with the hardware on her front door. Original to the home, this brass doorknob really seemed to work. Our salesperson guided the homeowner to keep what “wasn’t broken” and continue using this ornate door knob which really serves as a jewel to the home – and it works with the design and in conjunction with the rest of the house. A nod to the past, this doorknob reminds all who enter that although this home is updated and current, it has a history which should be respected and enjoyed throughout all of its future generations.
The original brass doorknob adds character and charm to the home.
If you are considering updating the hardware throughout your home, consider adding different finishes to meet your needs and work with your design. Our designers can help guide you to select the right choices that will bring you happiness every time you enter a room!
New doors and windows can be a big investment of time and money, but is that investment actually worthwhile? Recently we checked in with a Door Store and Windows customer who purchased twenty new Marvin windows for her home back in 2007. When we asked how the look and function of the windows compared to when they were first installed over a decade ago, she replied “I really can’t tell a difference.”
The Porter Family in front of their 12-year-old Marvin windows
When the Porters moved into their 90-year-old Louisville home in 2004, they knew that window replacements were on the horizon. They wanted windows that looked original to the home, but provided modern safety, energy efficiency, sound proofing, and temperature control. After looking into several local vendors, they decided to trust TDSW as an authorized installing retailer of Marvin windows.
After 12 years, these windows still look as good as new!
Once the Porters decided to move forward with Door Store and Windows, owner Ann Gregory visited Angela Porter in her home to look at the existing windows and discuss options. Angela recalls that this left a great impression on her as she had a young child at the time and visiting the Idea Showroom would have been difficult.
The Porters selected these Marvin windows because they were energy efficient, easy to clean, matched the style of the home.
The Marvin windows that the Porters selected had a historical feel and resembled the original windows in their home, with wood and framing color options that they could not find anywhere else. According to Angela, the installation process was quick and smooth. The windows offered immediate gratification and checked every box: beauty, safety, efficiency, and noise abatement. A bonus, she added, was the convenience of cleaning the easily removable windows.
The Porters also appreciated that Door Store and Windows is a local, family-owned company. In 2008, their home was damaged by a fallen tree, and while insurance covered the repairs, Angela recalls that TDSW representatives were quick to repair the broken windows to look exactly as they had before. If she had to do it all over again, she wouldn’t have changed a thing. “It isn’t inexpensive,” Angela said, “but it is worth it.” Door Store and Windows stands behind their products. Once the initial investment is made, our doors and windows will last, and if any problem comes up, we’ll will be there to fix it.
Let us help you love your windows. Call Door Store and Windows today!
https://doorstoreandwindows.com/wp-content/uploads/2019/09/RL1-7661a-web.jpg10591589adminhttps://doorstoreandwindows.com/wp-content/uploads/2022/10/Door-Store-Windows_25th-Anniversary-Logo_JM-1.pngadmin2019-09-10 14:35:002020-02-27 16:44:37Customer Satisfaction, 12 Years Later!
Looking for exterior design inspiration? Door Store and Windows can help. Take a look at these gorgeous homes with Door Store and Windows products and find something that you’ll love.
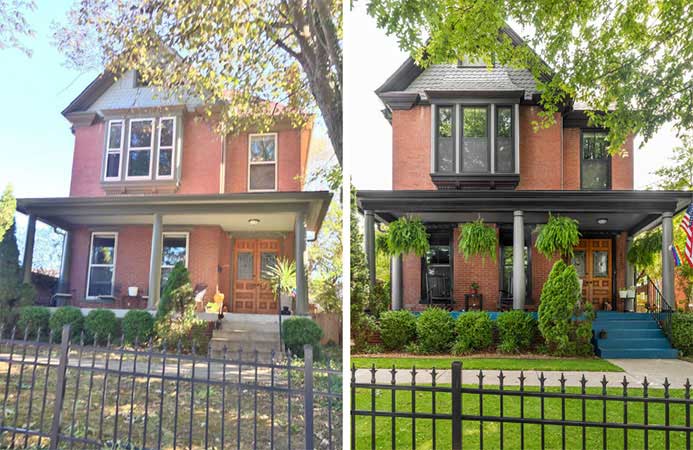
Belknap Neighborhood Doors and Windows:
Full windows and doors on this fantastic Belknap brick home completely refreshed the look and feel of the exterior. The red is simply striking.
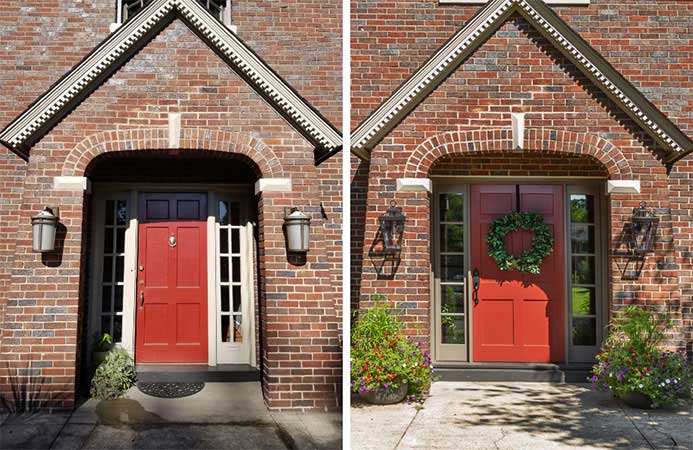
Vibrant Highlands Douglass Front Door:
This enchanting cherry red door highlights the rusty tones of this beautiful Highlands brick house. A bold color choice creates a warm and welcoming entrance.
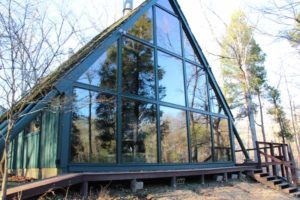
Beechwood Village Florida Room:
Soak up the summer and warm up your winter with a Florida room like this one we replaced in Beechwood Village. These stunning, energy efficient windows maximize sunlight and bring the outdoors in without sacrificing comfort.
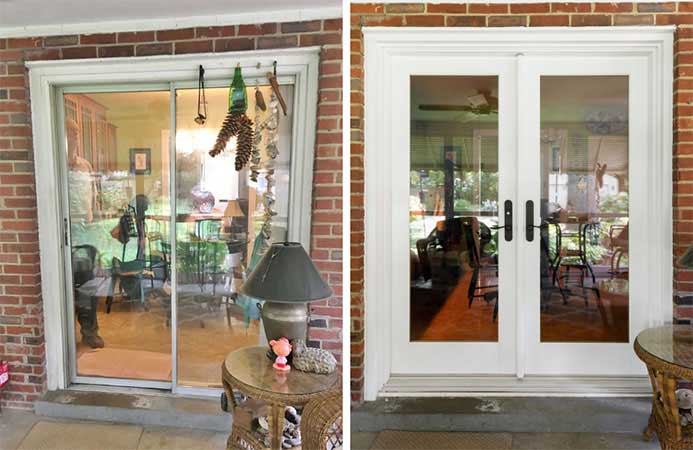
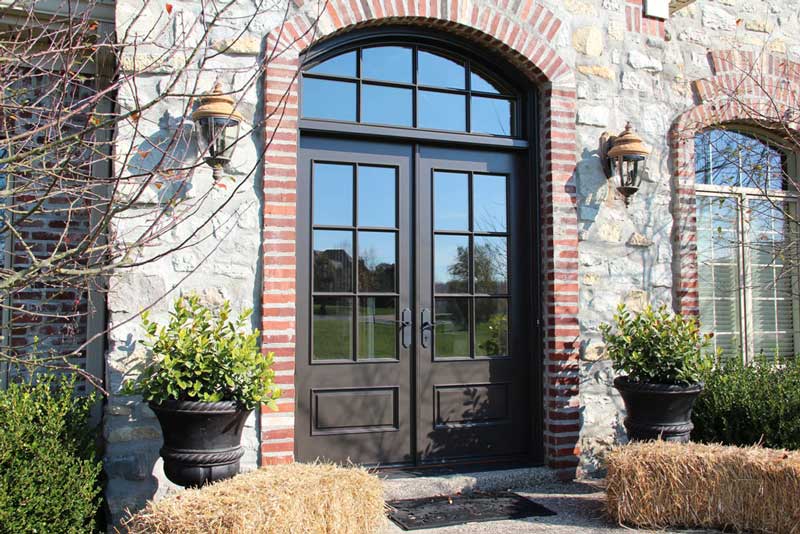
Indian Hills French Doors:
Simple, classic, functional, and striking. Look at how these Marvin French Doors transformed this Indian Hills indoor/outdoor entertaining space.
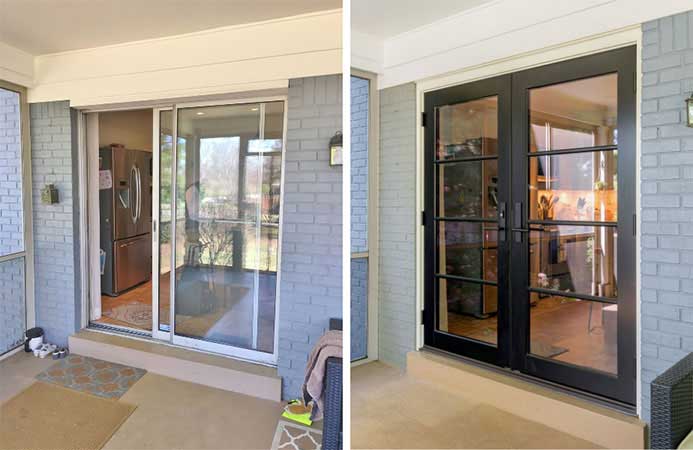
Crescent Hill Doors:
A new sliding patio door, front door, and side door. Refresh and modernize every entrance like we did on this Crescent Hill home for added security, energy efficiency, and beauty with a lifetime guarantee.
Highlands Curb Appeal:
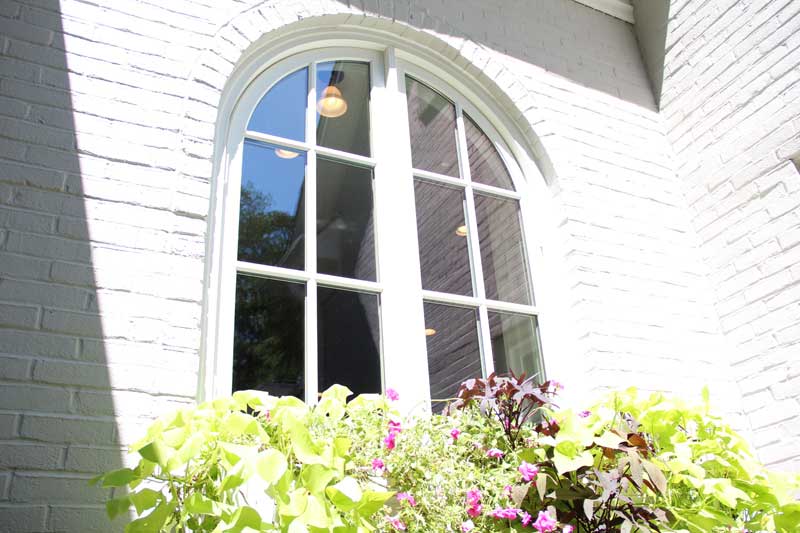
This stunning Highlands home is the perfect example of how we take advantage of what the house already has. These gigantic, historically inspired windows blend elegantly with the existing architecture and provide ample natural light.
https://doorstoreandwindows.com/wp-content/uploads/2019/08/2-web.jpg600924adminhttps://doorstoreandwindows.com/wp-content/uploads/2022/10/Door-Store-Windows_25th-Anniversary-Logo_JM-1.pngadmin2019-08-30 09:37:582020-02-27 16:45:16Exterior Design Inspiration by Door Store and Windows
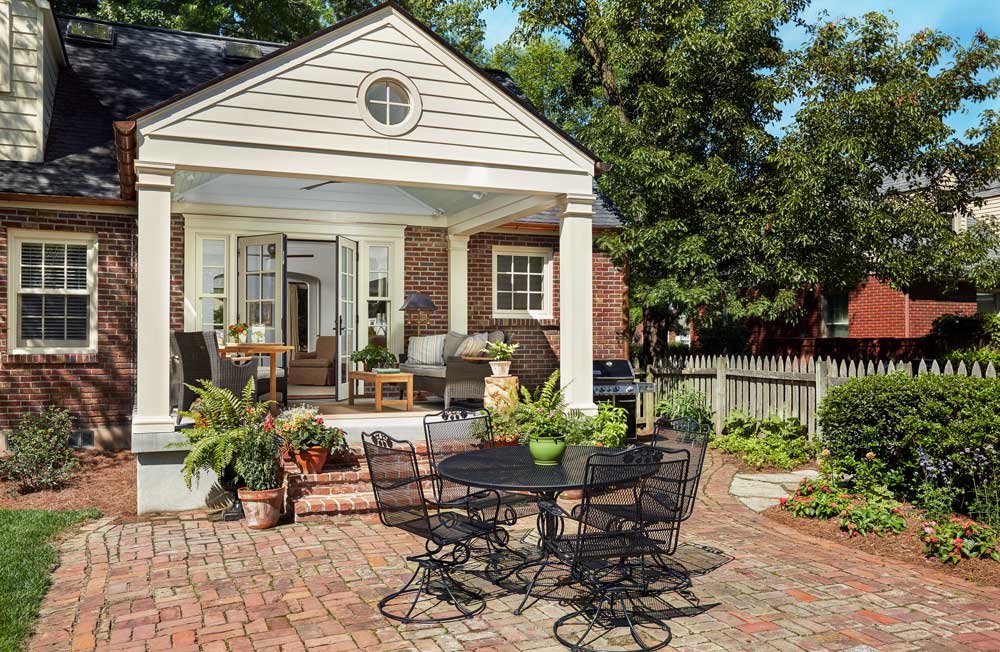
A substantial remodel can completely change the look and feel of a home. With a lengthy project it can feel like one big decision after another, but don’t overlook or underestimate small details that can make a tremendous difference. Recently we worked with a client on a back-porch remodel that was chock full of little details.
Now that their renovation is complete, our client shared with us eight small details that made a huge difference to their remodel:
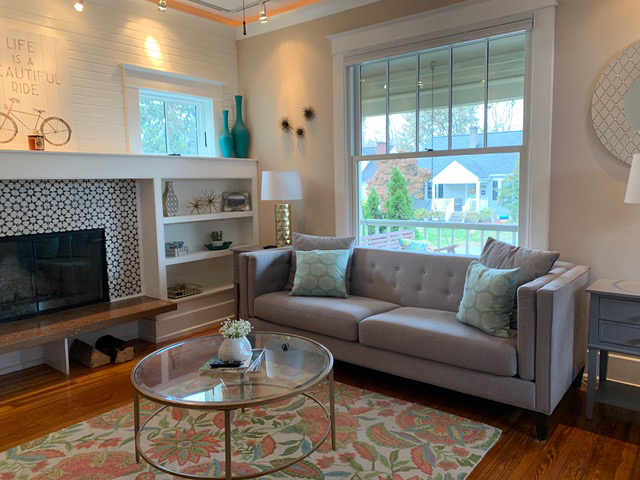
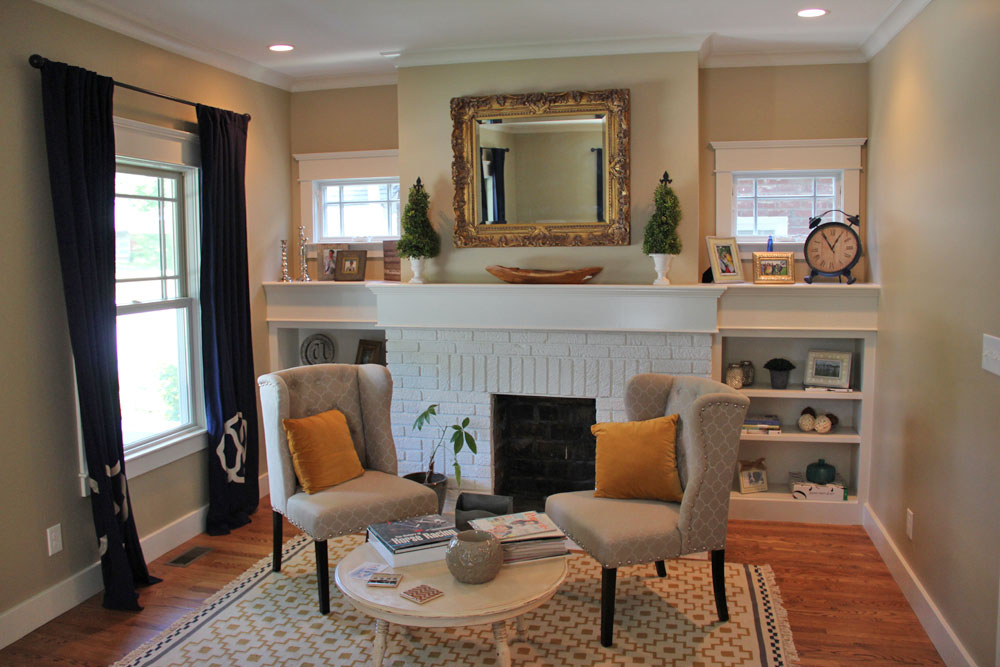
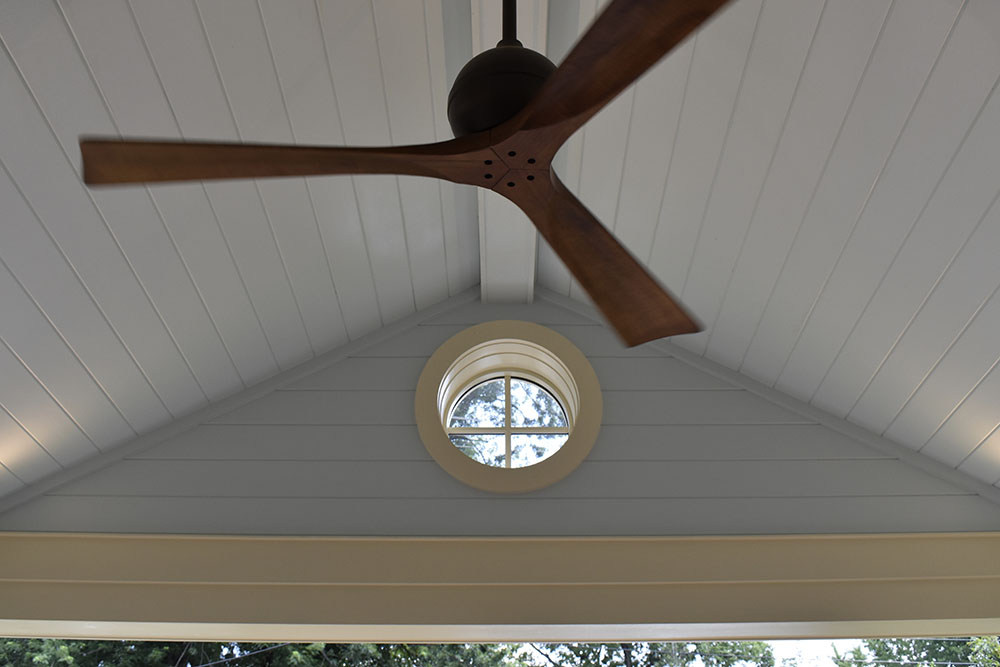
Porch Ceiling: I chose to paint the porch ceiling a gentle blue color, partly because it’s a Southern tradition, but also because it matches my living room walls just inside. The color matching conveys a feeling of seamlessness between the indoor and outdoor areas, making the porch seem like an extension of my living room.
Window Trim: In place of sidelights, I chose to put two skinny double-hung windows on either side of my patio door. When they installed the windows, they put a raised panel below the windowsill offering me a deep ledge and a beautiful decorative accent on the wall. My contractor also made custom plinth blocks to match the rest of the trim.
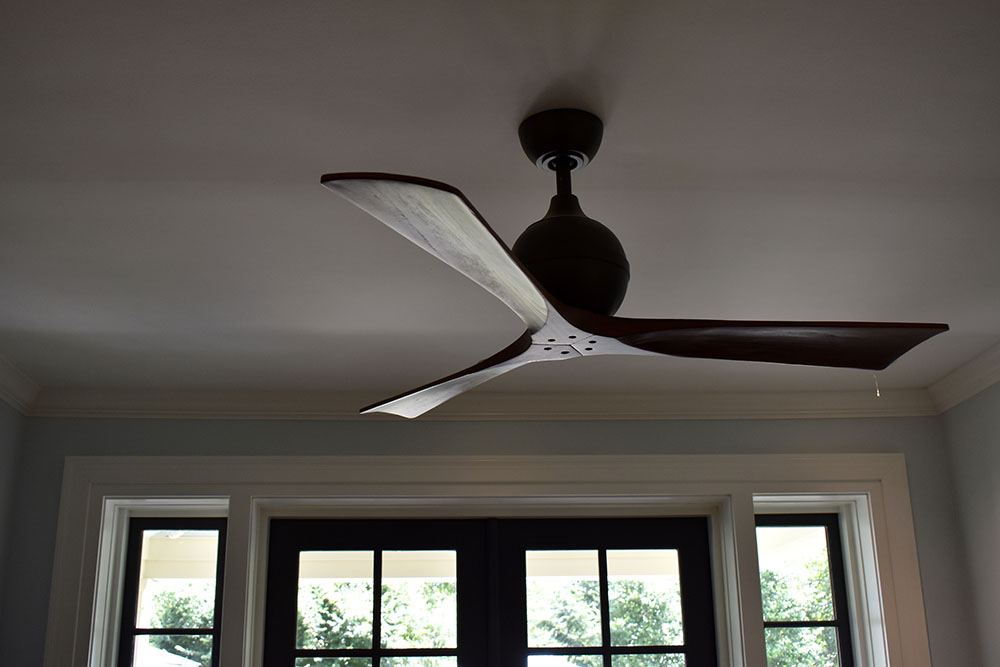
Ceiling Fans: I chose to install contemporary fans in my otherwise traditional home. They’re beautiful, but also a statement piece. Similar to the blue paint color, I chose to have my inside and outside fans match. This supports the feeling of continuity between the indoor and outdoor living spaces.
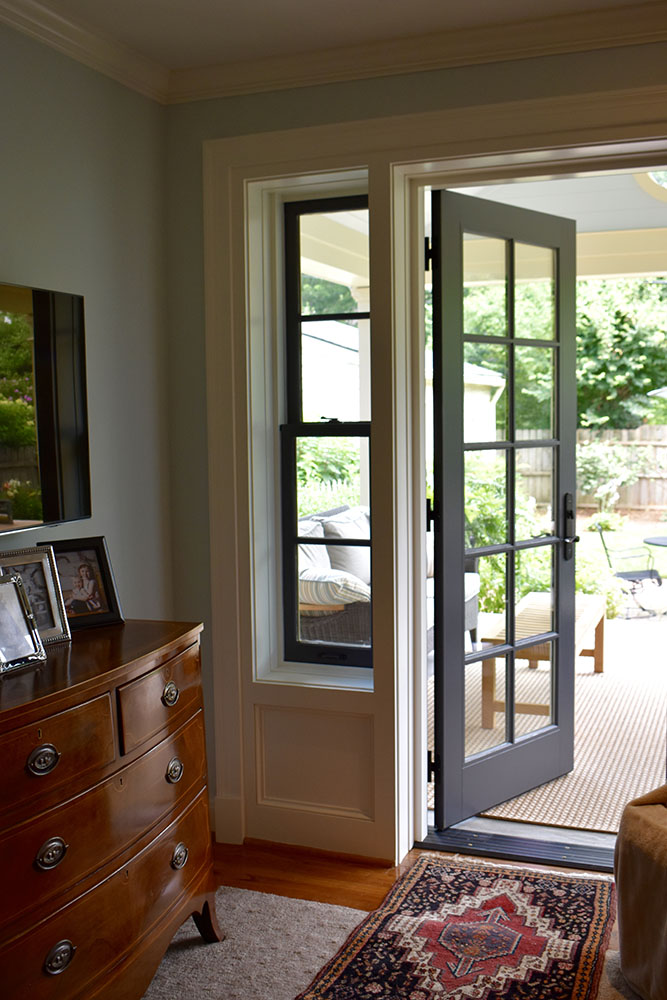
Patio Door: In order to maximize my space and to allow for a flat threshold, I chose an outswing patio door. I couldn’t have a screen door, but the outswing allowed me more flexibility with my interior design. Plus, the doors lay flat outside when they’re open, so they don’t take up porch space.
Interior Wood: I chose a dark interior wood color for my windows and doors. The contrast is striking and really makes the beauty of the doors and windows stand out. If I’d chosen white, the doors would have blandly faded into the wall.
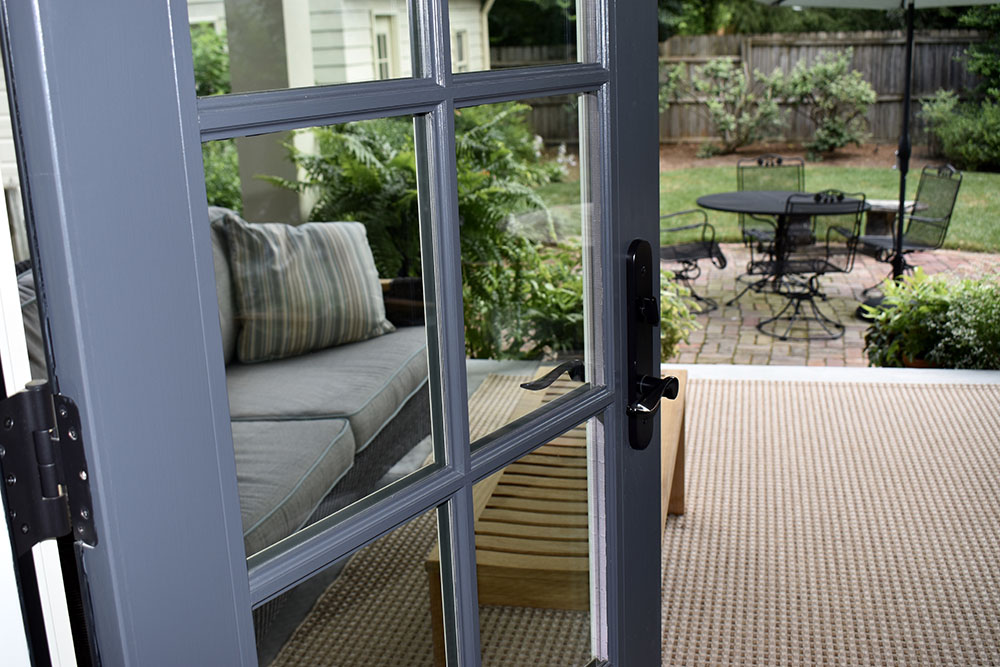
Hardware: For my patio doors, I wanted to choose a dark hardware that wouldn’t show dirt as these doors will get a lot of use. I decided to go with an oil-rubbed bronze. An oil-rubbed bronze finish can turn, particularly in the sunlight, but since this patio door is in the shade, it was a great choice.
Mismatch: Throughout my remodel, I’ve chosen windows of varying sizes, shapes, and heights. I never wanted all of the windows in my house to match. The windows and the patio door don’t line up perfectly, and I’m happy with that. I think the end result is eclectic and charming.
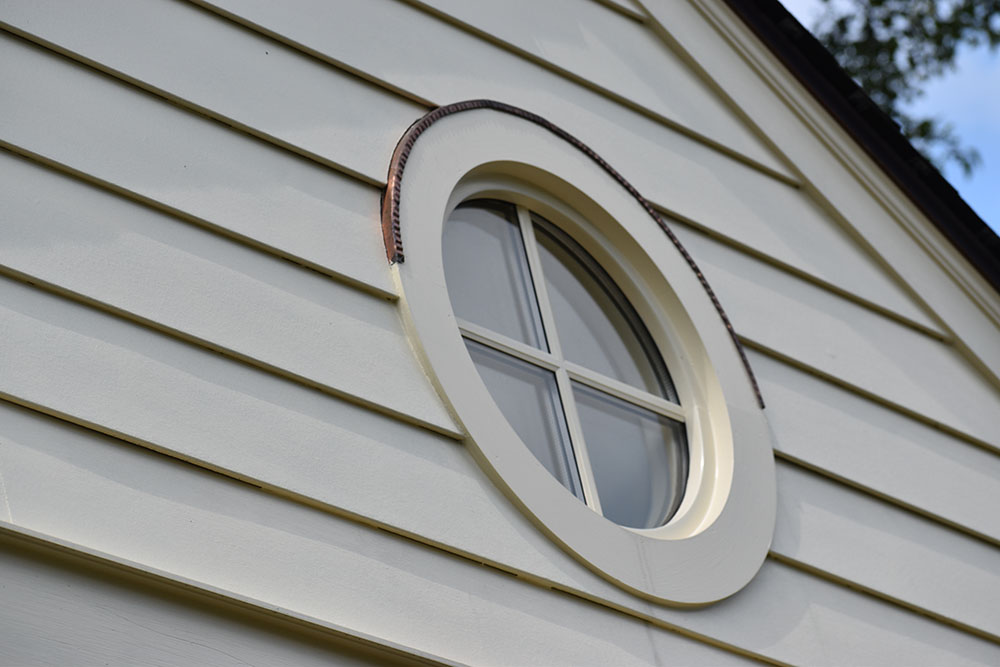
Flashing: I’ve always loved the look of copper, and I’ve always wanted copper gutters. When the doors and windows were installed, I decided to get copper flashing above the patio door and patio gable window. This is a small detail that you might not notice at first glance, but it helps tie everything together and makes the space feel complete.
Learn more about this project from the contractor, Todd Stengel, in this video!
From advising you on the swing of your patio door to ordering custom double hung windows that fit just perfectly in your space, Door Store and Windows can help your home remodel come to life. To get started on the project of your dreams, give us a call at (502) 822-5424 today!
https://doorstoreandwindows.com/wp-content/uploads/2019/07/DSC_0122-web.jpg6671000adminhttps://doorstoreandwindows.com/wp-content/uploads/2022/10/Door-Store-Windows_25th-Anniversary-Logo_JM-1.pngadmin2019-08-13 09:15:472020-02-27 16:46:09Eight Small Details that Made a Huge Difference in my Remodel
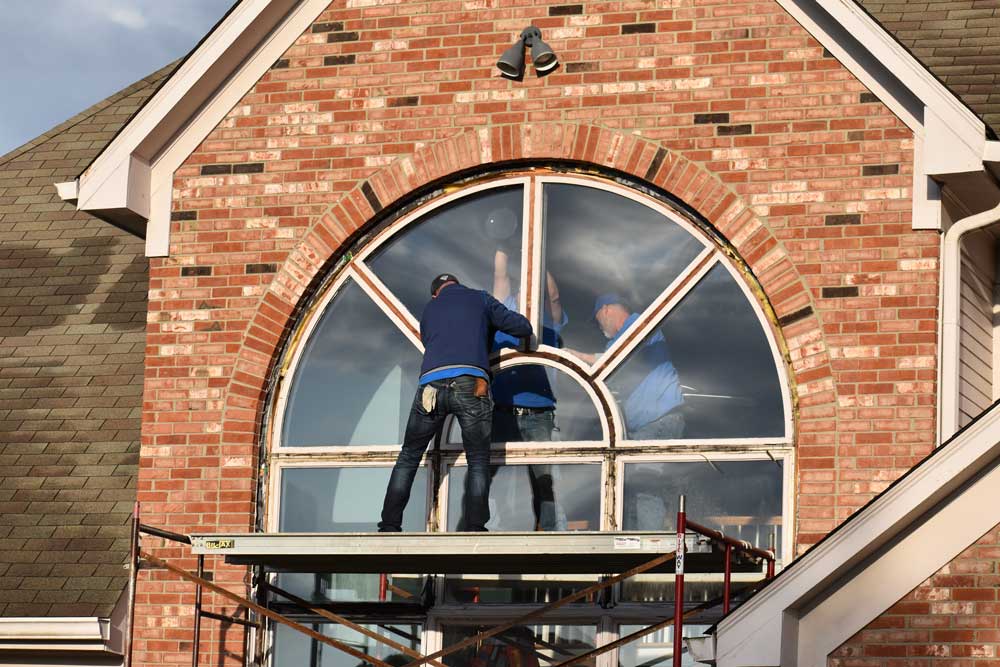
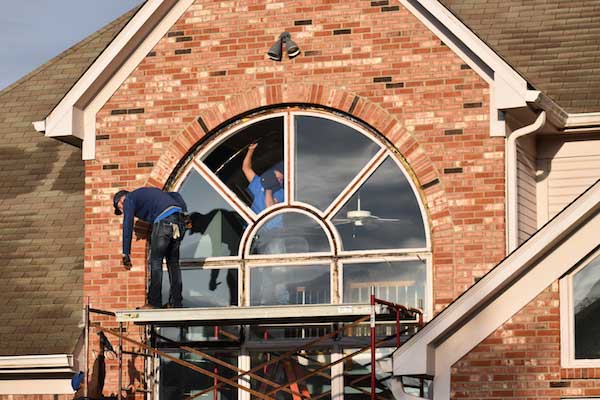
In our last post, we shared the initial stages of our largest window replacement to-date: a 10 ft by 17 ft, two-story Palladian window. One of the most important aspects of the installation was ensuring that the homeowner was without a window for as brief a time as possible. To guarantee a swift, safe, and secure installation, TDSW spent significant time in preparation. From start to finish, this Palladian window replacement took the TDSW crew three days.
Day 1
For the comfort and safety of the customer, it was vital that no part of the window remain open overnight. To ensure that the installation process could be completed in one day, the TDSW team spent the first day of the install in preparation, setting up and troubleshooting the installation process. Due to the size of the window, we built scaffolding so that the removal and install could happen quickly and safely on the second day. Once the prep work was complete, we were ready for the actual installation.
On day one we built scaffolding and did prep work to ensure that the window could be removed safely and easily on day two.
Day 2
On the second day, a team of six worked for approximately six hours carefully removing the old window and installing each piece of the new product. The glass in the old window was un-tempered and fragile, and this combined with the poor condition of the surrounding wood made the removal much more time-consuming than the installation. Once the old window was removed, the team installed the new product from the bottom up. By the end of the day, the window was fully installed and ready for finishing touches.
The old window had to be removed one pane at a time.
Day 3
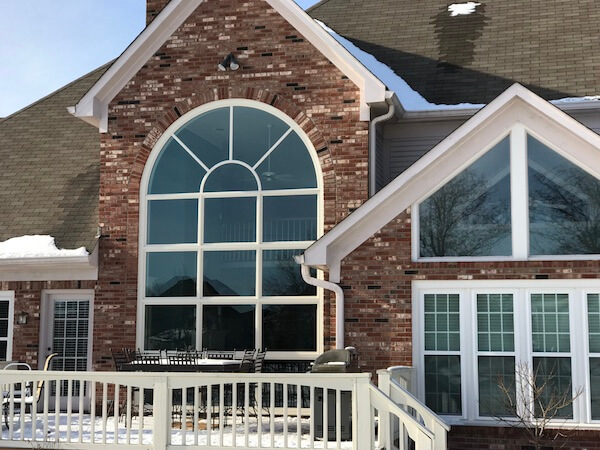
On the final day, the team trimmed the new window and cleaned up the space. Casing was added to the interior, completing the look, while brick mold with an aluminum clad finish was added to the exterior. Finally, the team broke down the scaffolding and cleaned up any debris from installation.
The customer was delighted with the finished product!
Check out the time-lapse video of this project!
Door Store and Windows is proud to have the opportunity to replace the windows in your home, from the smallest to the largest statement windows. No matter the project, replacement, custom or new construction, TDSW is here to help. Give us a call today!
https://doorstoreandwindows.com/wp-content/uploads/2019/07/IMG_2669-copy.jpg450600adminhttps://doorstoreandwindows.com/wp-content/uploads/2022/10/Door-Store-Windows_25th-Anniversary-Logo_JM-1.pngadmin2019-07-15 08:45:532020-02-27 16:46:23Palladian Window Installation – Part Two
Replacing more than one window in your home may sound like a daunting project, but at Door Store and Windows we strive to make the replacement process as simple as possible for the homeowner. One important aspect of this is our efficient rolling installation.
During your window installation, the TDSW team breaks into two groups. Team A begins the installation process on the first window, removing the old and preparing the frame for the new. At the halfway point, team B begins removing the second window and preparing the frame. This way, as soon as team A finishes installing the first new window, the second is ready to be installed. This rolling process guarantees that the project is done quickly and efficiently without leaving your home vulnerable to the elements.
An installation project timeline depends on the number and type of windows you plan to replace. We are proud to say that we complete most of our installation projects in one to two days, causing as little disruption as possible.
Our window installation process consists of the following steps:
1. Team Arrival, Introduction, and Work Space Preparation
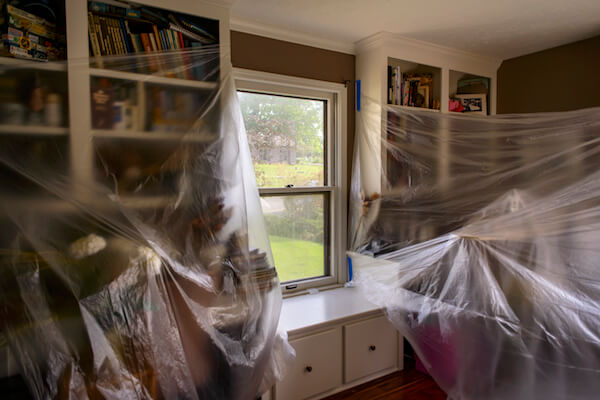
Our installation team consists of two to five people, depending on the size of the project. When the team arrives, they introduce themselves before preparing their work space. To contain debris, we place plastic sheeting on the floor and surrounding surfaces in each room. Our team lays a plastic walkway throughout the home so that our team members can carry heavy equipment without affecting your floor. As required by the EPA, we use additional coverage when replacing very old windows which have been covered with lead-based paint.
Plastic sheeting is placed around the window to be removed.
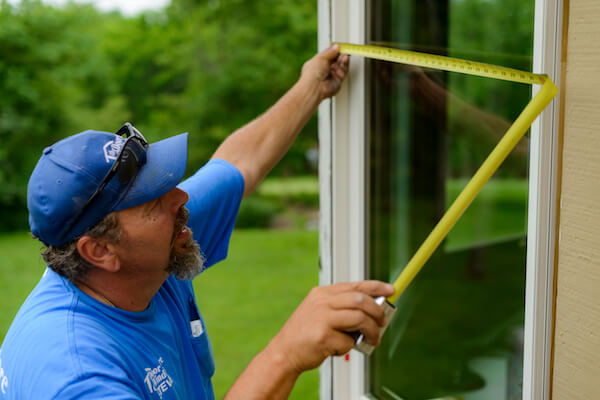
2. Verify Measurement
Before removing any windows, our team makes sure to re-measure the insert area and the new window. This guarantees that the correctly sized product was delivered and that we will be able to complete the project once we begin demolition.
A TDSW Installer measuring the window insert area.
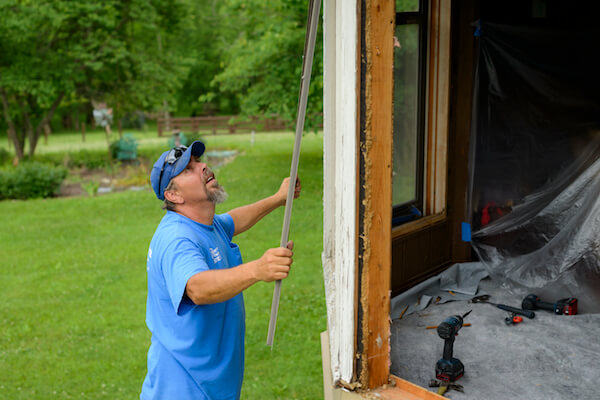
3. Remove Old Window
After measurements are verified, our team carefully removes the first old window, preserving molding and surrounding areas.
The old windows are carefully removed.
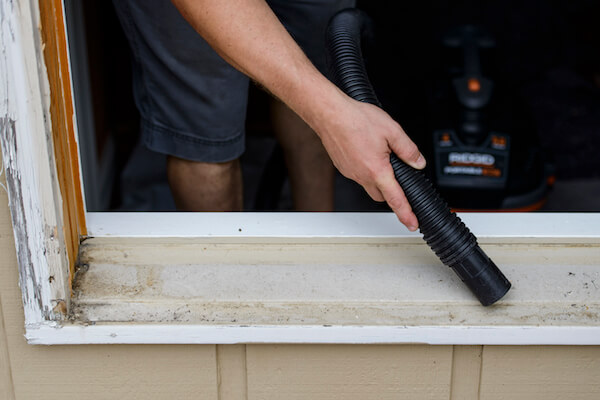
4. Clean Insert Area
Once the old window is removed, our team cleans up any loose paint, dust, and other debris from the insert area. At this point in the demolition, you may be able to see inside your wall. This surprises some of our customers, but there’s no need to worry: our team will ensure that there are no signs of demolition once installation is complete.
The insert area is thoroughly cleaned before installation.
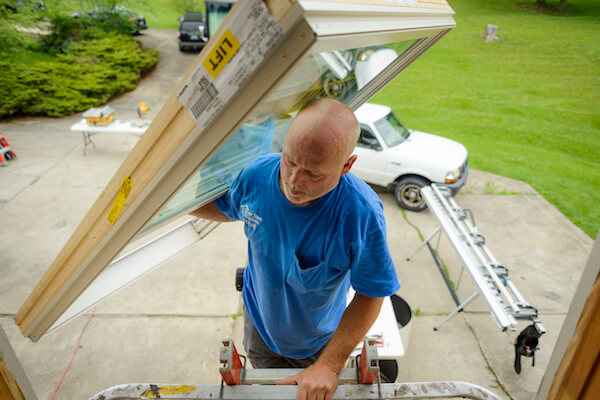
5. Installation
Our team carefully unloads the new windows, removes the packaging, and installs the product. Once the window is set and secured, we use spray foam insulation around the perimeter. This creates an energy-efficient seal. Then, we reapply the trim.
A TDSW Installer lifts the new window into place.
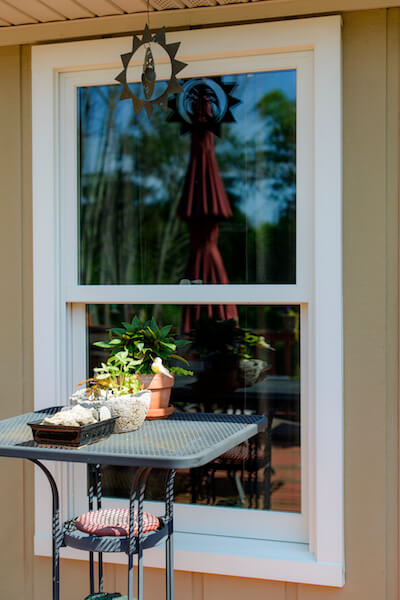
6. Clean-Up
After installation we clean up any debris, vacuum the area, and remove the plastic sheeting.
Even if you are not planning to sell your home anytime soon, it is an inevitable question when you consider remodeling: How much will this improvement add to the value of my home?
Each year, Remodeling Magazine publishes the “Cost vs. Value Report” which identifies remodeling projects and their associated return on investment. The report compares the changes in project costs against Realtors’ perceptions of what those improvements will bring to a home’s resale price. The 2017 report is out and includes details on the Louisville, KY market.
Many of the highest return home improvement projects target updating the envelopes of homes with new windows, entryways and siding. While resale value is one factor to consider in a remodeling project, the value to your lifestyle matters as well. Even if your dream project does not net a high return, if you are planning on staying in your home for many years, even a small return can help you justify your project.
This report also provides some insight into remodeling costs which can help those new to remodeling get a bit of perspective on budgeting.
If you’re ready to start your dream project, give us a call at 502-896-1717.
https://doorstoreandwindows.com/wp-content/uploads/2017/01/BlackburnAve-A-IMG_3206.jpg534800adminhttps://doorstoreandwindows.com/wp-content/uploads/2022/10/Door-Store-Windows_25th-Anniversary-Logo_JM-1.pngadmin2017-01-26 18:27:142020-02-28 09:53:48Find Out How Louisville Remodeling Projects Affect the Resale Value of Your Home
You know that Door Store and Windows sells and installs replacement windows and doors. But we also have established strong relationships with some of the top builders, remodelers and architects in the area to be their window and door specialists.
Meeting Needs of Builders and Remodelers
Building professionals have specific needs and we have developed a team to meet those needs. Whether it’s evaluating blueprint drawings, consulting and measuring on the job site, or assisting pros and their homeowner customers in our Idea Showroom, our team can help bring your new construction or remodel project to life.
Check out some of our Louisville-area building and remodeling projects. (Click title to view Case Study)
We can sort through the subtle details of windows and doors to turn the ordinary into extraordinary. Bring your builder or architect to our showroom or we can hook you into our network of fantastic Louisville-area building professionals. Call us today at 502-896-1717 to get started.
https://doorstoreandwindows.com/wp-content/uploads/2018/06/The-Back-1.jpg533800adminhttps://doorstoreandwindows.com/wp-content/uploads/2022/10/Door-Store-Windows_25th-Anniversary-Logo_JM-1.pngadmin2016-04-29 14:21:232020-02-28 09:57:45Working with A Builder or Architect? We Can Help!


 You can read the summary and view the